Build yourself a foundation in carpentry.
This course is a very solid introduction to carpentry techniques. It provides an understanding of most aspects of carpentry that are important for developing practical skills as a handyman, landscaper, property manager, farmer or other such roles.
- Find out about different types of timber, carpentry tools, cutting, making joints, and finishing.
- Undertake several woodwork projects, photograph your work and have it assessed.
- Start at any time - study at your own pace.
Get started on a new career, improve your existing career or improve your own home.
-
The course provides an understanding of most aspects of carpentry that are important for developing practical skills as a handyman, landscaper, property manager, farmer or other such situations.
-
Learn about working with wood in landscaping, building construction, furniture making, fencing or any other application.
Our Carpentry course is not a substitute for the practical instruction one might obtain over a long apprenticeship, internship or other such experience, but its scope will provide students with a broad and balanced understanding of wood work. The course explores a wide range of applications, and in doing so, complements and enhances the development of your knowledge about carpentry.
COURSE STRUCTURE AND CONTENT
Course Duration: 100 hours
Start Date: Start at any time - study at a pace that suits you, and with full tutor support for the duration of your studies.
Lessons: The course comprises 10 lessons as detailed, below.
1. Scope and Nature of Carpentry
2. Carpentry Tools, Equipment, Materials and Safety
-
Hand Tools - saws, hammers, chisels drills, planes,screwdrivers, other tools.
-
Power Tools - nail guns, saws, electric drills, planer, sander, router.
-
Materials - sandpaper, steel wool, nails, wood screws, glues, wood filler.
-
Safety.
-
Tool Maintenance.
-
Sharpening techniqes.
-
Sharpening tools -planes, chisels, saws.
-
Cutting and Joining Timber.
-
Storage - tool boxes.
-
Hiring tools.
3. Cutting and Joining Timber
-
Types of joints - edge, butt,angled, mitres, framing, dovetail, mortise and tenon, housing joints, halving joints, etc.
-
Nails.
-
Screws.
-
Staples, bolts, connectors, straps, corrugated fasteners, glues.
-
Glue blocks, dowels,biscuts, splines.
-
Cutting and shaping timber.
4. Small Carpentry Projects
5. Outside Construction
-
Choosing timber.
-
Pests - termites.
-
Timber preservatives.
-
Keeping timber off the ground.
-
Using timber in the garden.
-
Recycled timbers.
-
Outdoor furniture.
-
Building a wood deck.
-
Building a wood fence.
-
Where to build in the garden.
-
Constructing a wall with railway sleepers.
6. Constructing Small Buildings
-
Types of foundations.
-
Framing.
-
Roofing.
-
Building a wooden cabin.
-
Building a wood gazebo.
-
Building a cubby house.
7. Understanding House Construction
-
Timber framed buildings.
-
Timber floors.
-
Doors and door frames.
-
Door Construction.
-
Door frames.
-
Architraves and skirting.
-
Windows and frames - sash, sliding sash, casement, pivot, slat.
-
Roofs - single, double, trussed,etc.
8. Handyman Repair Work
-
Fitting a lock.
-
Repairing a sash window.
-
Fitting aqnd hanging doors.
-
Hanging a cupboard door.
-
Form work for concrete foundations.
-
Relaying floorboards.
-
Resurfacing timber floors.
-
Repairing a broken ledge and brace gate.
9. Finishing Wood
-
Creating smooth surfaces - using a plane, sanding, etc.
-
Paints, stains and varnishes.
-
Polyurethane.
-
Shellac.
-
French polishing.
-
Stains.
-
Paints - defects in painted surfaces, repainting.
-
Veneering.
-
Preparing outdoor surfaces.
-
Tips for outdoor finishes.
10. Planning and Setting Out a Project
-
Setting out.
-
Making a setting out rod.
-
Introduction to technical or trade drawing.
-
Drawing instruments.
-
Types of drawings - plans, sections, elevations, etc.
-
Setting out a technical drawing.
-
Building regulations.
-
Measuring up.
-
Working out quantities.
-
Preparing and surveying a site for construction.
COURSE AIMS
-
Describe the scope and nature of carpentry; differentiate between different timber products, and discuss the appropriate use of each.
-
Describe all significant carpentry tools and identify appropriate uses for each. Identify and manage risk in a carpentry workplace.
-
Describe a range of different techniques for cutting wood in a variety of different situations.
-
Describe and compare different techniques for joining wood.
-
Undertake a small carpentry project.
-
Explain construction of different things in an outdoor situation with wood, including fences, furniture and retaining walls.
-
Explain the construction of different types of small buildings which are constructed mainly with wood, including garden sheds, gazebos and cubbies.
-
Explain a range of common carpentry tasks that a handyman may need to undertake in routine maintenance and repair work.
-
Explain a range of different techniques for finishing wood.
-
Determine an appropriate approach for planning a timber construction project.
-
Explain how a site should be set out in preparation for a construction project.
HOW TIMBER CAN BE JOINED TOGETHER
Woodwork joints are categorised into various types, but there are many variations within each category which are distinguished by things like the shape, angle or depth of the joint. Nowadays many joints used in construction are machine made. Others used in specialist work and fine furniture making may be cut by hand. We shall now review some of the more common types of woodwork joints. Whilst we have categorised them into a number of groups for the sake of simplicity, but bear in mind that these are not necessarily distinct from one another.
1. Edge Joints
Edge joints are used to make things wider e.g. panels, car cases, and table tops. The timber is joined edge to edge across the length. Most edge joints are glued, but there are exceptions e.g. straight edged floorboards, or the wooden hoops of a whiskey barrel which are held together with iron hoops. Some edge joints are reinforced with dowels, biscuits or interlocking surfaces. These reinforcements are mainly used because they make aligning the joint much easier and any additional strength gained is secondary to this purpose. Edge joints include things like butt joints, ploughed and tongued joints, tongued and grooved joints, and splay rebated tongued and grooved joints.
Butt Joints
These are the simplest type of joint. They may be needed for things like wide panels and kitchen bench tops. With a butt joint two pieces of timber are butted up against one another. These joints work well using lengths up to about 1.2m but thereafter tongues and other reinforcements such as dowels may be needed to hold the timber flush.
Tongued and Grooved Joint
These are very useful with longer lengths of board. One board has a tongue protruding along the length whilst the other has a groove into which the tongue is set. Some older tongued and grooved joints consisted of two grooved boards and a separate double tongued piece in between.
Making Edge Joints
When setting out edge joints it is imperative that the two edges which are brought together are square and flush. If glue is used, then it must be of good quality and the surfaces of the timber must be clean. When clamping timber, it should not twist or buckle - you should only need enough pressure to hold the timber firmly in place.
Sometimes a spring joint is included when abutting boards. This is where a very shallow groove is planed on the edges of the boards to be joined. The groove tapers towards the centre of the board so that when the boards are joined there is a very tiny gap in the middle of the joint. This enables more pressure to be applied at the ends of the boards when they are clamped since it is the ends which are most likely to fail first because more moisture is lost from the ends. The spring joint therefore compensates for possible failure of the joint towards the end of the boards.
When setting out boards to be edge joined, if you plan on planing them afterwards then you will need to make sure the grain is running the same way in each piece. Clamp the timber together first without glue to check that surfaces meet and are flush - plane edges if necessary. When gluing, use enough glue so that it squeezes out of the joint when tightened and wipe off the excess. Always clamp on a flat surface to give your end-product the best chance of being flat.
2) Angled Joints
These are joints where the edges of boards are brought together usually at right angles to one another. They are used in casings, panels, and linings. There are many different examples including things like mitred joints, tongued, grooved and mitred joints, tongued, grooved and beaded joints, and so forth.
Mitred Joint
The simple mitred joint is where the edges of two pieces of timber are cut at an angle of 45° and then joined together at 90°. It is an attractive joint when viewed from the outside - for example on the corners of a picture frame, or where skirting boards meet in the corner of a room. Mitres can be cut at any angle in accordance with the angle the two pieces of wood meet at. For instance, if the timbers meet at 120°, the mitred joint would be cut at 60°.
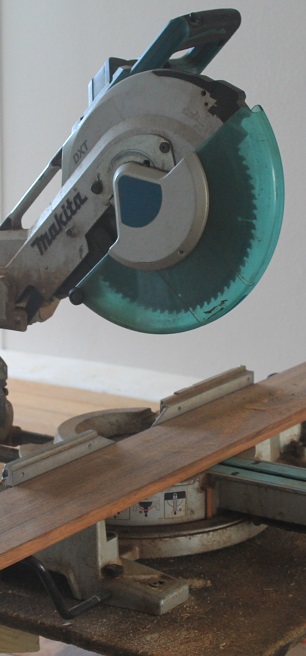
Since mitred joints require great accuracy in cutting, most mitred joints are cut using machinery such as the mitre or drop saw. Once the angle has been set up, it may be necessary to test cut some scrap wood and make any necessary adjustments before making the final cut.
3) Framing Joints
There are many different framing joints and these include the dovetail joint and mortise and tenon joint. We could also include housing joints here, but we'll deal with those separately.
Dovetail Joint
These are widely regarded as the strongest type of joint for joining the edges of two pieces of timber at right angles to one another, and are often considered the most difficult to master. The joint is made up of corresponding 'pins' and 'sockets' - or 'tails' (which are respectively like a tenon and open mortise). Both the pins and sockets are wedge-shaped so that the pin of one piece of timber fits into the socket of the other. The number of pins and sockets, and how widely they are spaced out will depend on what the joint is needed for. For maximum strength, the width of the pins and the space between them will be equal. Where aesthetics are of more concern, fewer pins may be used e.g. a ratio of 1:3 (pins to space).
If a dovetail is well made it does not even need to be glued however, the interlocking nature of the joint allows for a large surface area for gluing which provides additional strength which makes them very difficult to pull apart. The only disadvantage is that these points can be hard to set out properly and if they are not made accurately then they will not be as strong or aesthetically pleasing as they should be.
When cutting a dovetail, the angle used should not be too acute otherwise the edges may split off. Likewise, if the angle is too shallow there may be movement in the joint causing it to wear. For hardwoods the dovetails may be cut at a slope of 1:8 and for softwoods this should be around 1:6. In other word the angle for hardwoods may be slightly shallower.
To hand cut the joints for a common or box dovetail, the two pieces of timber to be joined should first be cut to size and planed so that the ends are square and smooth. With the exception of secret dovetails (see below), the socket should be cut first as it is quicker this way. The timber may be held in a vice and a depth (or shoulder) line is marked around both sides using a gauge set at the depth to which the sockets are to be cut. The dovetails are then marked out using a bevel which has been set at the required slope. Start at the outsides with the half sockets and then measure the space between and divide evenly for sockets and pins. Alternatively, you could make a template with the correct slopes on it.
Where several joints are to be made, the other pieces may be clamped with the first so that they can each be cut at the same time. Using a dovetail saw or tenon saw, cut the sockets down to the shoulder line. To cut out the pins, the timber is secured in the vice with the edge uppermost. The piece with the sockets cut out is then placed over it so that it is flush with the outside. The tenon saw is then placed inside the socket and a kerf is made flush against the inside of the socket. The cut piece is removed out the way and the position of the pins on the piece in the vice are marked all the way around; and they are cut down to the shoulder line. The waste wood in between is cut out using a bow or frame saw, or for smaller dovetails a coping saw may be used.
HOW THE COURSE WORKS
You can start the course at any time.
It is studied by distance learning, so you can study in the comfort of your own home. But this doesn't mean you are all alone in your studies. Our highly qualified and friendly tutors are there to help you every step of the way. If you have any questions at all, they are always happy to help.