Course Structure
There are eight lessons including a special project in this course:
- Introduction
To be able to take good travel photographs, the first essential is to know and understand the equipment and materials used in photography. Part of this first lesson is aimed to ensure that you have this basic knowledge.
- The Main Principles
This lesson aims to provide you with a firm understanding of how you can work at improving your capabilities with respect to taking travel photographs. It provides a framework, upon which you will base your work in future lessons.
- Creating Different Effects
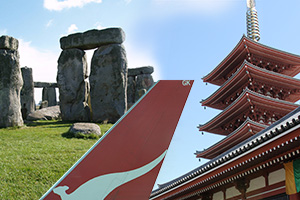
Learn how to achieve different effects with snapshots and scenic shots.
- Photographing Natural Areas
Learn how to photograph wilderness shots and seascapes.
- Photographing Streetscapes
Learn the two main types of street photography: posed & candid
- Photographing Interiors
Look at the difficulties involved in photographing interior subjects and how to overcome them.
- Developing Your Photographic Style
By using photographic equipment skilfully and learning how to adjust settings on digital cameras and sense the way different types of film will respond to different colours and different situations (e.g.: haze, back light, side light, reflected light etc).
- Major Project
Aims
- Identify the scope of travel photography, and the resources required to take travel photos
- Explain how you can work at improving your capabilities with respect to taking travel photographs.
- Apply camera techniques including framing, positioning, timing and borrowed landscapes to create various effects.
- Photograph natural areas to make best use of their texture or even give them human qualities.
- Photograph streetscapes to create different moods or capture elements of your choice.
- Photograph indoor scenes making best use of available and artificial lighting.
- Create a series of travel photographs which contain a single common feature that differentiates them from other photographs, and in doing so, provides an indication that they are likely to have been taken by the same person.
During the course, you will learn more about - Choosing When to Take the Photos
The time of year and day can have a dramatic effect upon the image you capture. The first things to consider though, are the seasons and the weather. Both impact in a large way on the opportunity for creating effects. As seasons change, so do landscapes.
Autumn
In Autumn, you may have brightly coloured leaves on trees which fall and cover the pavements with orange, red, pink and yellow.
Winter
Depending upon the location: trees drop leaves and light intensity can drop. These things may create a starker looking landscape. But in other places, winter brings with it the richness of fresh snow, contrasting deep browns and vibrant colours.
Spring
Spring opens with fresh new foliage and colour, while natural lighting effects may be different due to changing skies.
Summer
When summer makes its bold entrance with constant bland blue skies, a hazy atmosphere, and drier landscape, foliage loses its brightness and the potential for great landscape photography/effects diminishes.
In a tourist season, or during school holidays, interesting shots may be sometimes obstructed by hordes of people, so avoid the crowds as much as possible. The land has a much more interesting emotive feel outside of peak season.
The viewpoint you select may dramatically alter the effects of the photo. Choosing a less common viewpoint has the potential to change a mundane photo into an intriguing one. The average picture is taken 5-6 feet off the ground (at eye level), and this is landscape view everyone sees.
You can give a fascinating insight into a landscape by photographing it from a rarer viewpoint. For instance, an aerial viewpoint of a landscape is often more interesting because it provides a view people rarely get to see. This viewpoint can pick up patterns on the surface that could not be seen at ground level. Try lying on the ground to take the photo and see what you pick up. Then stand on stairs or on a building to get up higher to 9 or 10 feet. The same landscape looks different. Which viewpoint do you want to present?
To keep the object size the same, move the camera left or right to get a different viewpoint. To change the height of the object, raise the camera up or down. Looking up at the object will magnify it, while objects further away will become even tinier. To change the scale of an object, cut the distance between the object and your lens by simply moving forward.
Photographs depicting a precise moment in time are more rewarding and exciting than others. Landscapes are constantly changing, and you will need to be both patient and prepared to capture the exact moment in time where all the aspects of the scene slide together for a split second to create your wow-factor picture.
What Are the Advantages of Studying Photography with ACS Distance Education?
- You can start at any time to suit you.
- The courses are self-paced.
- You can study when and where suits you. They are flexible to fit in around you and your lifestyle.
- Keep up to date on your learning.
- Update your CV.
- It is not just a course, it is a package of learning that includes – course notes, tutor feedback, self-assessment tests, research tasks and assignments.
- Our tutors are all experts in their field, with years of experience in photography and teaching.
- They are also keen and enthusiastic about their subject and enjoy working with students to improve their knowledge and skills.
- Courses are also updated regularly to meet the demands of the changing needs for knowledge and to keep our courses up to date.
What Next?
- Do you love to travel?
- Do you love to take photos?
- Do you want to improve the photographs you take while you are travelling for work or personal purposes?
- Study this extensive and intensive travel photography course and learn how to be a better photographer.
You can enrol today by clicking the “Enrol Now” button above.
Or
Click here to Contact a Photography Tutor.
Or Request a Prospectus Here.