Light in Photography
NATURAL AND ARTIFICIAL LIGHT SOURCES
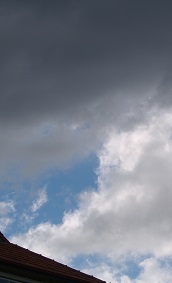
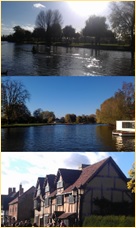 The sun (daylight) is the most common light source used in photography. Daylight however is not constant. It varies from place to place and at different times of the day. Light can be more direct, and shadows stronger when there are no clouds in the sky, and in the middle of the day, when sun is directly overhead. In overcast conditions, shadows will be less noticeable.
Daylight provides a continuous source of light. Artificial lighting can be either momentary (occurring for a brief period of time), or continuous. Flash photography is momentary, and as such, the taking of the photograph needs to be synchronised with the flash of light.
Artificial light sources (continuous or flash) will normally have a different spectral analysis to what daylight has. Some types of light may be made up of more green, or orange light; for example; and the photographs taken under those conditions may not look natural. These differences in the nature of light, can to some degree, be compensated for by choosing an appropriate type of film.
Example
If film designed for daylight is exposed under tungsten lamp lighting, the photos will look more orange than normal, but if a film designed for tungsten conditions is used under tungsten light, the result will appear more relatively natural.
Properties of Light Sources
Light source can be defined in terms of four properties:
- Colour Temperature
- Power (or Brightness)
- Size
- Prevailing Direction
 Colour Temperature
Refers to the spectral analysis, or colour properties of light. There are colour temperature meters that will measure the exact colour make up of any light. However, measuring and controlling colour with such devices can be complex, and is perhaps something to consider only after other techniques of lighting control have been mastered.
Power or Brightness
Means the strength or intensity of light. This can vary with changes in weather (power is less in overcast conditions). Power can also vary according to the type and amount of artificial lighting, and the distance that the subject is, away from the artificial light source(s).
Size
Refers to how big the light source, reflector and/or diffuser are. The sun is huge in size; but heavy cloud cover greatly reduces the light. Light cloud cover will increase the effectiveness of the light by acting as a diffuser.
Prevailing Direction
Refers to where the light comes from, relative to the subject. The prevailing direction can cause shadows, and variations in tone or contrast. Sun (day light) comes from overhead, and rarely from below eye level. Artificial light can be directed from any desired angle.
You can have artificial light coming from a single or multiple directions, to create different affects, as desired. Sunlight can also be reflected by using reflectors (boards etc.) or even by utilizing available reflective surfaces (e.g. a white wall).
Copy Lighting
This involves using two different light sources, placed in equal positions, on opposite sides of the line between the camera and the subject. Ideally, locate these at a 45-degree angle to the camera-subject axis. In effect there is a beam of light hitting either side of the subject, and the result is to minimize shadows. This also minimizes texture.
FLASH PHOTOGRAPHY
Essentially, the idea of flash is that you don't need light continuously just to take a picture which uses only a moment in time. If you can synchronize a burst of light with the opening of a camera shutter then this will effectively illuminate a large area, depending on the size and power output of the flash.
In the 1960's, the most common amateur flash system was the magnesium filled globe, or in the case of the "Instamatic camera", the flash cube. The reusable electronic flash is only become widely available in the 70's. This works by using a large voltage stored in a capacitor (a sort of short term, high capacity battery). When discharged through a gas filled tube, the sudden charge causes the gas to glow brightly, similar to a neon sign.
Flash Synchronization
Although the peak duration of an electronic flash is very short, the flash must take a brief instant to reach its peak output. Also the camera shutter system must, of course, be open when the flash is at peak output.
Most cameras make the necessary electrical connections for the flash to fire in synchronization either by using a short co axial cable plugged into a "PC" socket from the flash, or connecting via a "hot shoe" contact built into the flash holding socket on the camera. If using a PC socket, there may be more than one socket. Use the one marked "X" for the flash. The socket marked "M" on some cameras has a special delay switch for certain now largely redundant flash bulbs.
The main thing to remember about flash synchronization is that most SLR cameras use a focal plane shutter. Focal plane shutters work like two window blinds where the first moves up to open the window and is then followed by a second one to black out the window again. Focal plane shutters are called "focal plane" because the shutters run virtually at the film plane. Focal plane shutters are used on SLRs because they save the need for building lenses within built shutters, which are much more expensive than those with only an aperture.
The problem with a focal plane shutter and flash is that as the shutter speed increases, the blinds begin to follow each other so rapidly that in effect they expose the film as a travelling slit. The film, in fact, is not completely exposed in one go at speeds above either a 60th of a second or on some cameras a 125th of a second. This means that a flash cannot be used at shutter speeds above a 60th of a second. If it is used above a 60th second, only a partially exposed frame will result. All cameras have the maximum speed for using a flash indicated in some way. If in doubt, consult your camera manual.
Mixing Flash and Daylight
A flash can be useful particularly in interior photography during the day. It will help fill areas with light which might not otherwise get sufficient light from a window. In cases where this is done, you should be careful to blend light sources evenly. Fill Flash is commonly used as a way of solving back light problems. A light reading from a subject is made, but the camera is generally closed down one stop to what is read to compensate for extra light from the flash. Bracketing is advisable, and although most computer flashes will work well for fill flash on the computer setting, calculating flash exposure for the manual flash output and then striking a medium between correct flash and daylight exposure can produce more reliable results.
Experience and experimentation is the key to effective fill flash photography.
[16/04/2025 23:24:35]